Want to create a report in Salesforce? This step-by-step guide shows you how to create a report, customize its filters and columns, save it to a folder, and run the finished report.
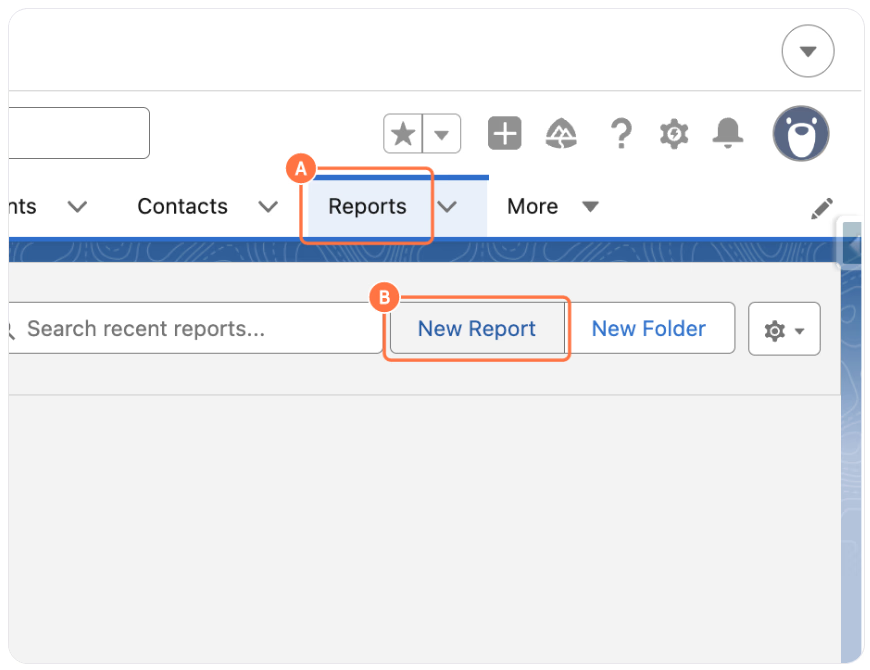
1. Create a new report
A. Click on Reports.
B. Click on New Report.
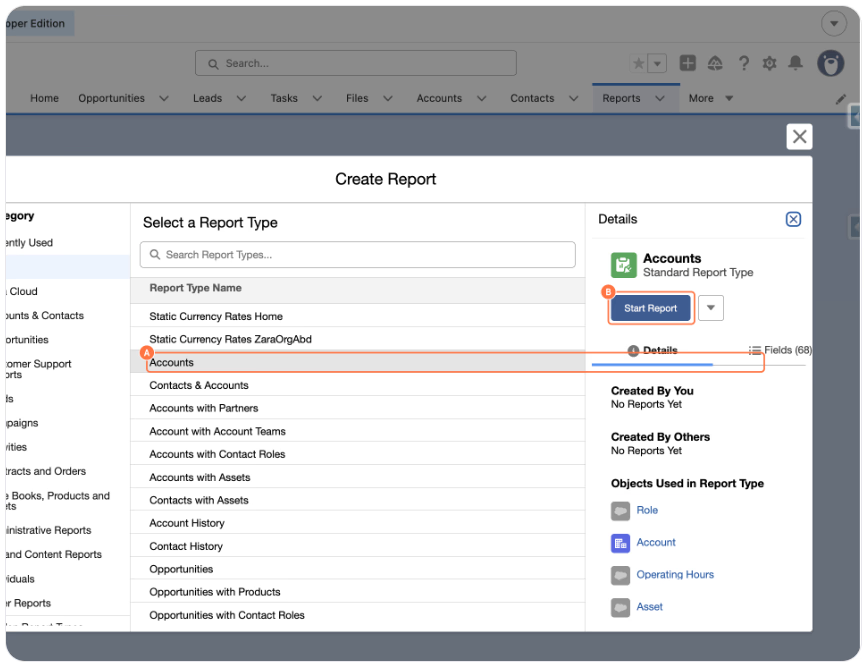
2. Choose a report type
A. Select a report type, such as Accounts.
B. Click on Start Report.
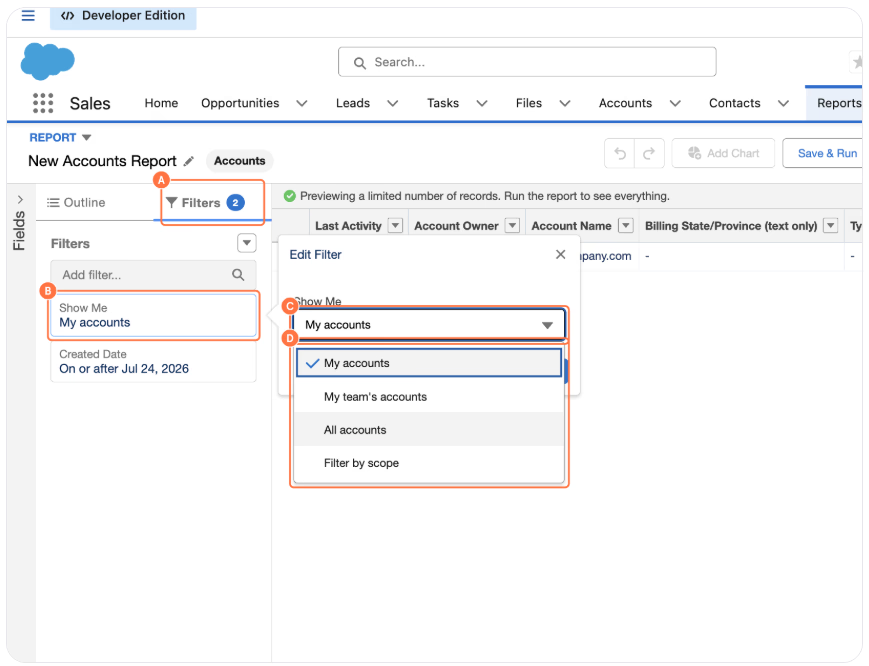
3. Choose which records to include
A. Click on Filters.
B. Click on the Show Me filter.
C. Open the Show Me dropdown.
D. Select the records you want to include in the report.
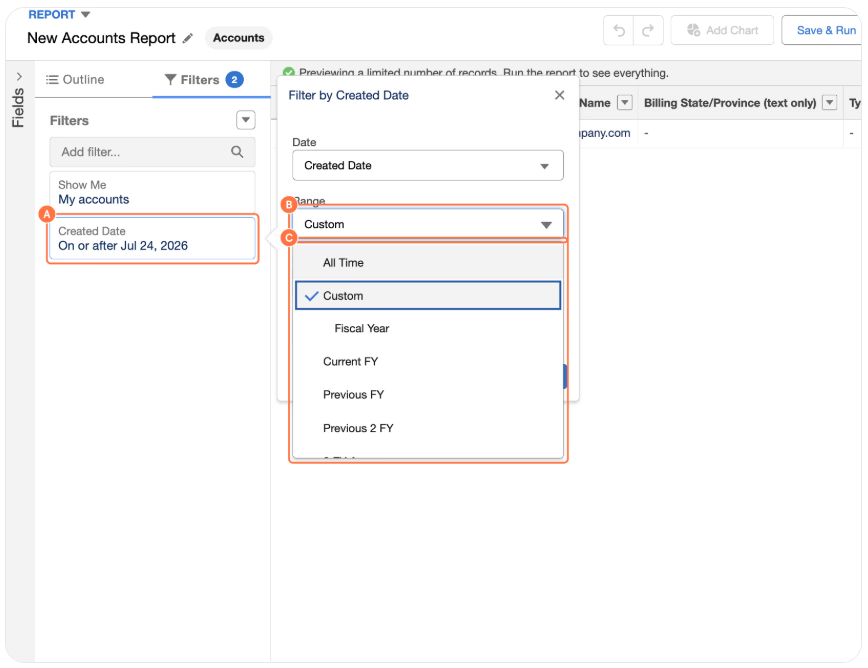
4. Set the date range
A. Click on the Created Date filter.
B. Open the Range dropdown.
C. Select the date range you want to include in the report.
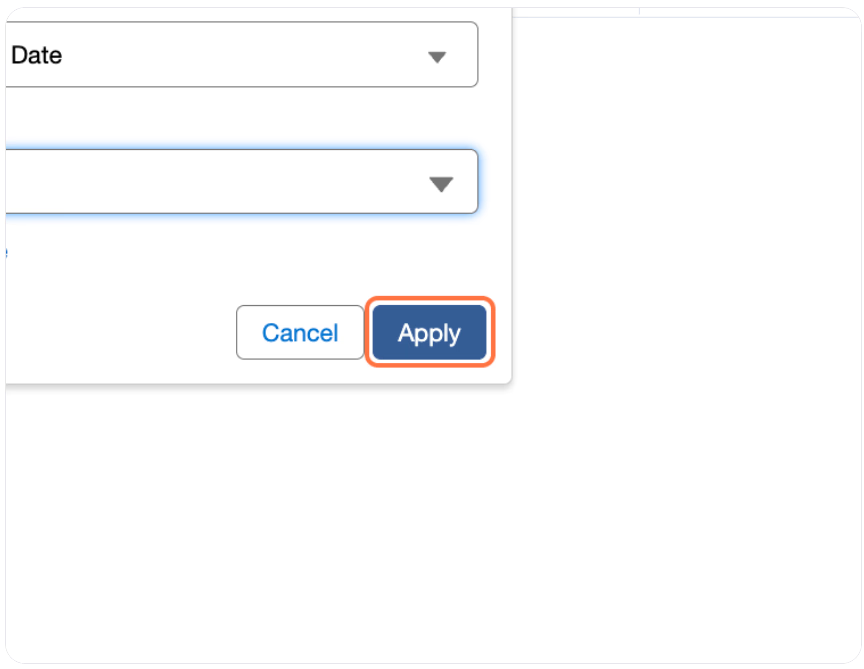
5. Apply the filters
Click on Apply.
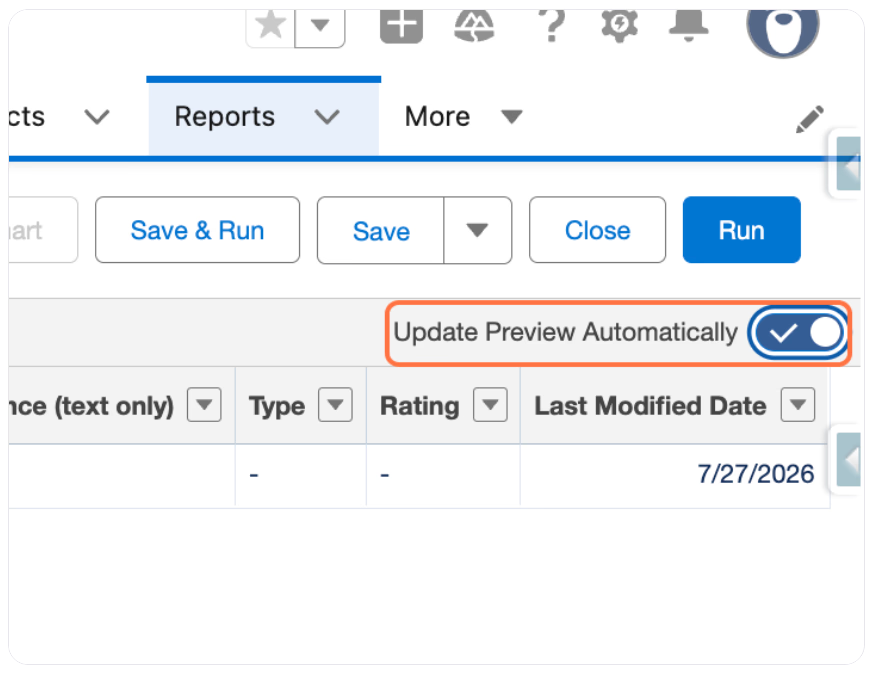
6. Automatically update the report preview
Toggle on Update Preview Automatically to refresh the report preview as you make changes.
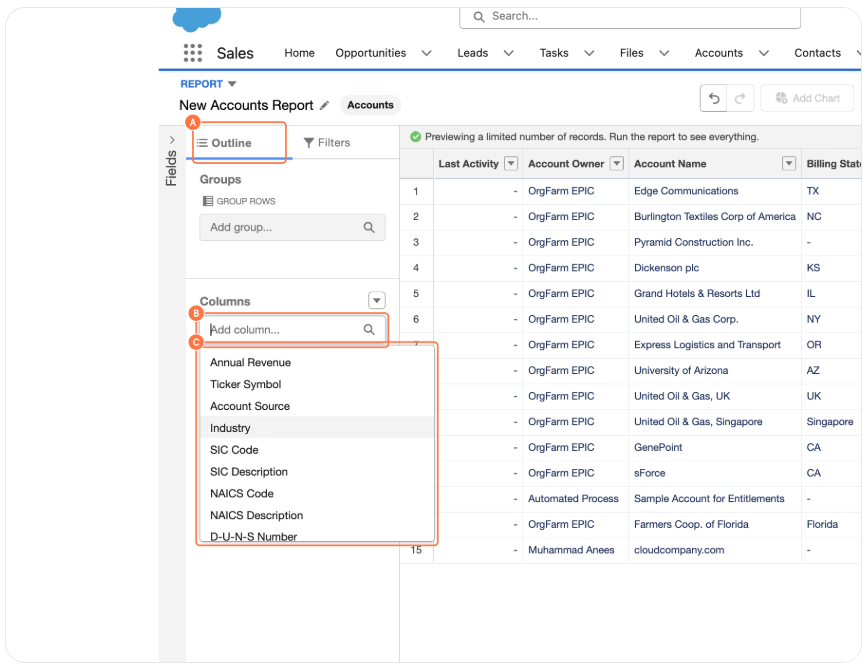
7. Add a column to the report
A. Click on Outline.
B. Click on Add column.
C. Select the field you want to add.
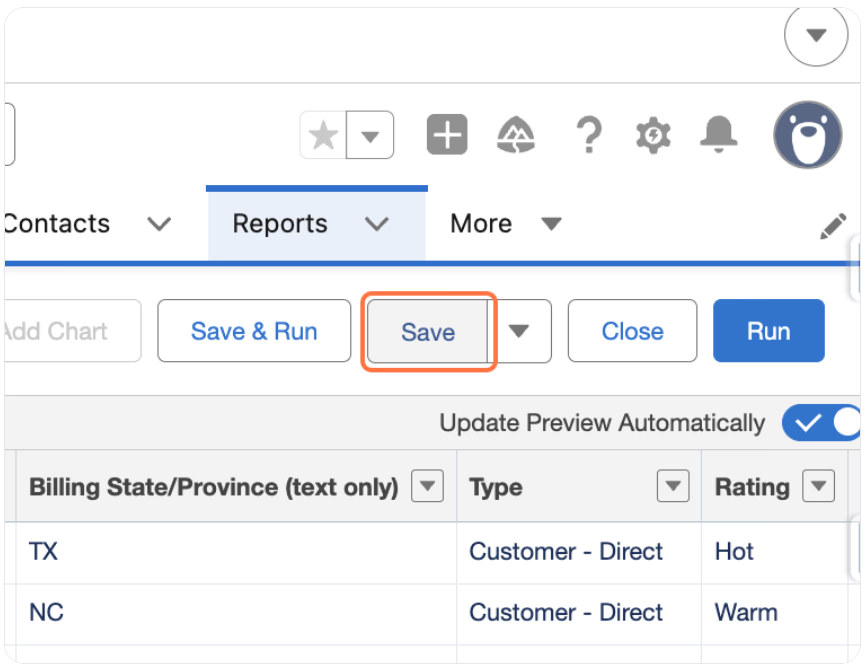
8. Save the report
Click on Save.
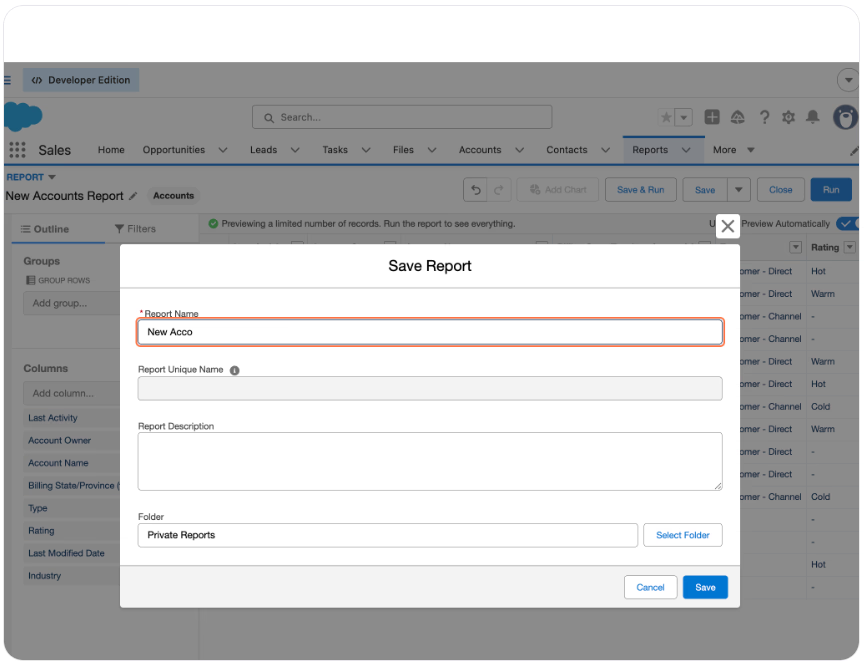
9. Name the report
Enter a name in the Report Name field.
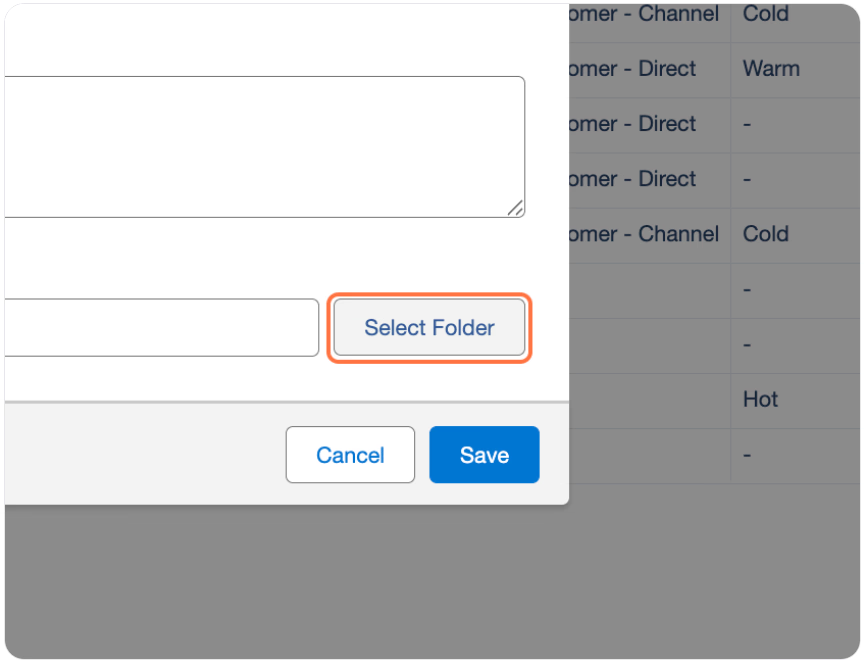
10. Choose a folder
Click on Select Folder.
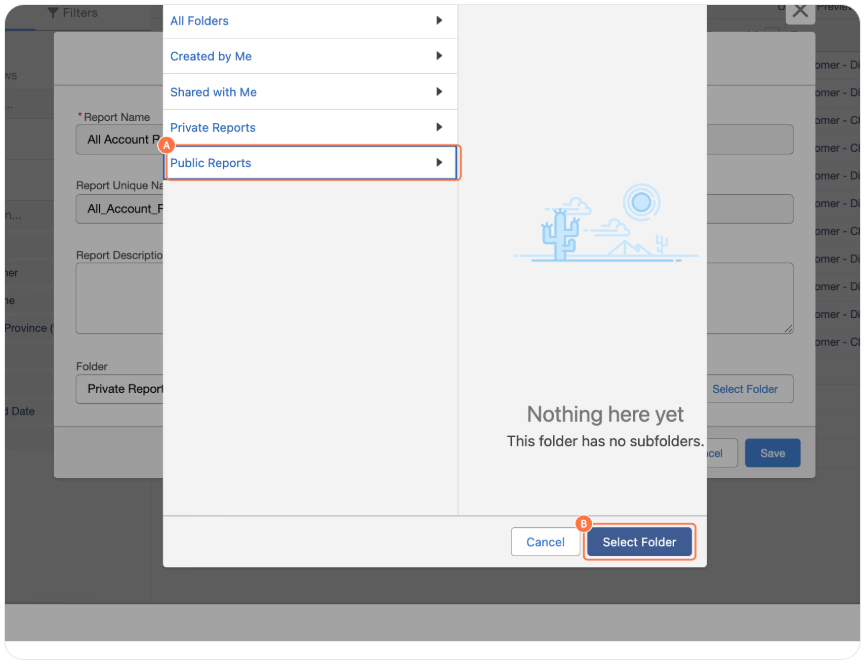
11. Select a report folder
A. Select the folder where you want to save the report, such as Public Reports.
B. Click on Select Folder.
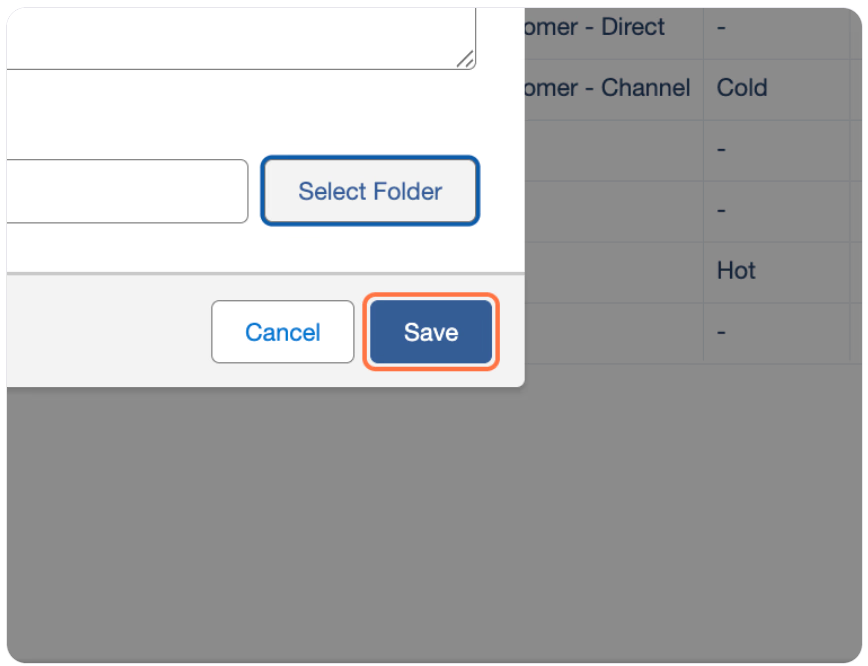
12. Save the report
Click on Save.
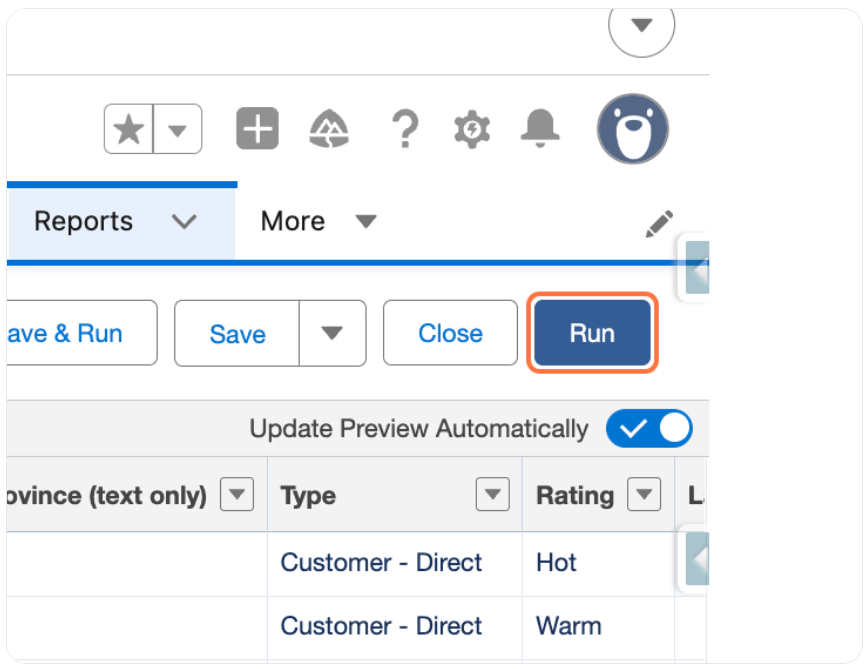
13. Run the report
Click on Run to view the completed report.
Well done! You've successfully created and run a report in Salesforce.